Using Manual Flash (for TTL Flash Users)
Those who frequent my blog would know that I'm a Fujifilm X series shooter. My daily driver is a Fujifilm X-T1 with an assortment of lenses, as well as a Fujifilm X-E2, almost always paired with a wide-angle such as the 10-24mm f/4 OIS. I have an entire guide on the Fujifilm X system, as well as an entire set of reviews on Fujifilm X gear, so feel free to check them out.
In this article, however, I'll be discussion how to use manual flash. This is particularly relevant for Fujifilm shooters as we don't have a strong flash system as Canon, Nikon and even Sony. The TTL (through the lens) metering flash systems on Canon and Nikon are excellent and as a result, most Canon and Nikon shooters won't ever have to worry about using manual flash.
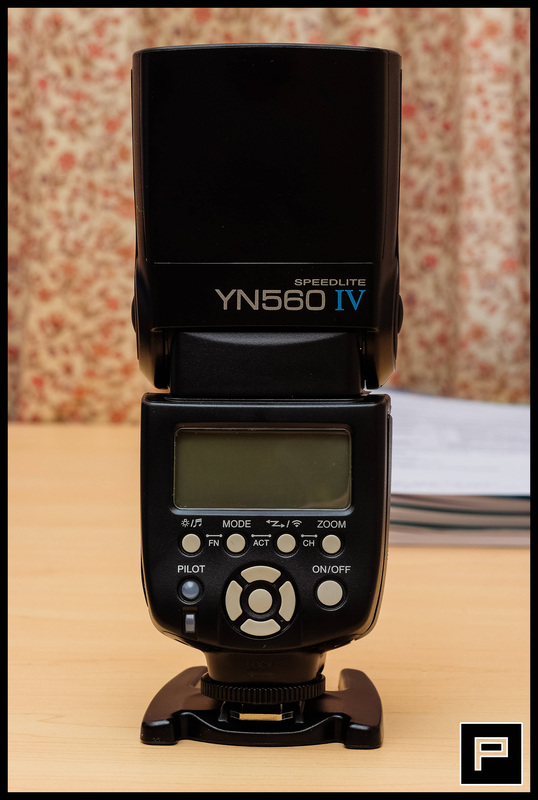
For Fujifilm, however, Fuji's only TTL flash that is actually comparable to the offerings from Canon and Nikon is the Fuji EF-42, but its construction quality is questionable, it doesn't even feature an inbuilt bounce card and it just isn't as great as even a mid-sized Canon or Nikon flash, such as the 580EX or SB700. That's why I recently bought myself two Yongnuo YN-560 IV manual flashes, so I can use them in manual and do flash work when required. Manual flash is like driving a manual transmission car - it can be a pain, but once you know how, you won't mind it that much. Here, I'll be going through what I do in order to get my manual flashes operating as painlessly and as easily as possible.
In this article, however, I'll be discussion how to use manual flash. This is particularly relevant for Fujifilm shooters as we don't have a strong flash system as Canon, Nikon and even Sony. The TTL (through the lens) metering flash systems on Canon and Nikon are excellent and as a result, most Canon and Nikon shooters won't ever have to worry about using manual flash.
For Fujifilm, however, Fuji's only TTL flash that is actually comparable to the offerings from Canon and Nikon is the Fuji EF-42, but its construction quality is questionable, it doesn't even feature an inbuilt bounce card and it just isn't as great as even a mid-sized Canon or Nikon flash, such as the 580EX or SB700. That's why I recently bought myself two Yongnuo YN-560 IV manual flashes, so I can use them in manual and do flash work when required. Manual flash is like driving a manual transmission car - it can be a pain, but once you know how, you won't mind it that much. Here, I'll be going through what I do in order to get my manual flashes operating as painlessly and as easily as possible.
Flash and Lighting Theory
If you're looking at adding manual flash to your workflow, I would expect that you're already aware of the effects of aperture, shutter speed and ISO on general exposure. If not, that's fine, check out this article here, which will explain all you need to know before heading back here to read the rest of this section on Flash and Lighting Theory.
Unlike with ambient lighting, when you add flash into the mix, the exposure equation becomes a little more complicated. It's almost too complicated to go into why here (I might write a separate article later), but it's important to know that the shutter speed does not affect flash exposure. That's right, regardless of whether you're exposing for 1s, 1/2s or 1/125s, the total amount of light added to the scene by your flash remains constant. Thus, the shutter speed only affects your ambient light exposure. This means that if you want to increase the ambient light in your shot, you decrease the shutter speed and if you want to decrease the ambient light in your shot, you increase your shutter speed.
To recap, a high shutter speed means relatively more flash, less ambient light. A lower shutter speed means relatively less flash, more ambient light. This is important, because shutter speed (and flash power, but we'll get to that) is the only way you can control the ratio of flash to ambient light. This is especially important for using fill flash.
Both your aperture and ISO will affect your flash and ambient light equally. So increasing your aperture by one stop, for example, doubles your total exposure, the amount of light from your flash doubles, the total amount of light from the scene also doubles.
NOTE - Here, we assume that your shutter speed is always below the flash sync speed. You can find out what this is by reading your camera manual or the specification sheet. In general, always keep your shutter speed below the flash sync speed.
Flash Techniques
I'm not going to be going through strobist or advanced lighting techniques here, because if you're familiar with them, then you should already be familiar with how to use a manual flash. I'm only really restricting what I'm going through here with what most people would use TTL flash for, i.e. for fill flash (to fill in the shadows left by ambient light) and bounce flash (where the flash is the main source of light).
Most of the time, in well-lit areas, you want to be using fill flash, for example, if you are outside, you want to use fill flash. Fill flash allows you to 'fill in' the shadows left by directional light sources such as the sun. In less well-lit areas, you want to use bounce flash, so that the flash becomes your main source of light.
Those of you who understand strobist terminology would understand that when using fill flash, you're using your flash as a fill light, when you use it as bounce flash, you're using it as a key light.
Bounce Flash
Bounce flash is easy, because when you're working with bounce flash, you want your flash to be the main light source and your ambient light to be more or less irrelevant. This means that you want your bounce flash to replace the ambient light, not supplement your ambient light, in the way you do with fill-flash.
The easiest way to use bounce flash is to set your shutter speed fast - the reason why we do this is so that you minimise the amount of ambient light in your shot and you maximise the ratio of flash to ambient light, which is what we want to do when using bounce flash. So set your shutter speed to something like 1/125s and we'll start thinking about the rest.
Now that your shutter speed is fixed, you need a way of controlling your exposure. You have three options - the flash power, aperture and ISO. You need to choose which, plus you at least need to be mindful of how they interact. I suggest not using a varying aperture, not only is it extremely difficult, it gets messy pretty quickly because you'll end up with shots of different depths of field and the aperture is something you want to control, you don't want to be beholden to use specific apertures for specific levels of exposure.
So it's a choice between adjusting flash power and adjusting ISO. Here's where the trade-offs come in. The best thing about manual flash is you can make these trade-off decisions yourself and you won't have the camera making them for you! Isn't that great? Now, using a high flash power and a lower ISO will give you better image quality, because less noise, more dynamic range, better colours, lower ISO is always better! But there has to be a catch and that is the fact that your flash will take longer to recycle and it will drain your flash batteries faster. Of course, if you need faster recycle times and longer battery life, then you'll have to put up with increasing your ISO and decreasing your flash power.
Whichever you choose is up to you, but let's assume that we choose to keep the ISO low, this means we'll almost always have to be firing the flash at 1/4, 1/2 or even 1/1 power. My tip here is to just leave the flash at 1/2 power (don't use 1/1 power unless you have to) and vary your ISO to compensate for your exposure.
Firstly, meter for the scene. So chuck your camera in manual mode, enter 1/125s, which we've chosen before and an appropriate aperture you want to be shooting at, say f/5.6. Now you want to drop your ISO to something like ISO400. The scene should be dark, if it's not, then you're probably not in an environment where you'd want to be using bounce flash (because the lighting is so good, you might as well use natural light + fill flash!). Just as an example, dialing those settings into my X-T1, in my bright room with an open window on a sunny day, it's dark. That's perfect, just what we want. (How did I know it'd be dark? Because 1/125s, f/5.6, ISO400 = EV of 10 (use an EV calculator), which is around a late evening outdoor light, bright afternoon light has an EV of around 14-15).
Now, we have to add a flash. Put your flash on at 1/2 power first and see how it fares with those settings. If your room is correctly exposed (which it should be) then you're good to go. If you're overexposed, drop the flash power to 1/4 and try again. If you're still overexposed, drop it again. If you're underexposed, you'll have to raise the ISO, so go to ISO800 and try again. The trick here is to understand that using bounce flash has very little to do with ambient light, because we've got such a high flash-to-ambient light ratio, any changes in ambient light will have a very small effect on the total exposure. In other words, even if the ambient light simply quadrupled, the effect would still be minuscule because it'll simply have such a little effect because it'll only be adding a slight amount of extra exposure on top of the total exposure with the flash. So long as you don't step from indoors out into direct sunlight, you'll be fine.
What does affect bounce flash considerably, however, is the distance from the flash to the surface you are bouncing off, for example, if you are bouncing of a ceiling, how high that ceiling is (and also other factors such as how reflective it is) will contribute most to your overall exposure. Using a bounce card can significantly stabilise the differences and also allow you to use lower flash power, so that's an option if your flashes have bounce cards. You might also want to use a diffusion dome, which, again, reduces the variance in exposure your bounce surface can cause.
Now what's left is to be able to know how to adjust for different situations and how to control your depth of field. If you suddenly have to move from an area with a lower ceiling to an area with a higher ceiling, there are one of two things you can do - you can either increase your ISO or increase your flash power. Note that there are other factors, such as how many walls are around which can also affect your flash exposure. You should scope out the building you're shooting in before shooting, so you can at least get a feel for what you should be using in each area. For example, if you are shooting a reception, you might want to note that on the dance floor, you use ISO800, in the hallway, you use ISO400 and in the private rooms, you use ISO200. Easy to remember, easy to execute.
Controlling your depth of field is also easy, say you want to go for a shallow depth of field for a portrait. We'll use the settings we've been using all along - 1/125s, f/5.6, ISO400, 1/2 flash power. If you want to go down to, say, f/2.8 for shallower depth of field, that's a two step increase in aperture, so decrease your flash power or ISO by two stops (divide by 4), so e.g. we might go down to 1/8 flash power, or we could go down to 1/4 flash power and drop the ISO to 200 or we could just drop the ISO to 100, leaving the flash power the same. Never change your shutter speed - it has no effect on flash exposure. This is where Fuji's system helps you, just look down at your aperture ring and it tells you all the full stops! f/1.4, f/2, f/2.8, f/4, f/5.6, f/8...etc. - no need to remember as with DSLR lenses. Note that here, I'm assuming that ambient light has little effect on your total exposure, if you're in a reasonably well lit environment, remember that dropping the aperture to f/2.8 will also increase your ambient light, so you might need to decrease the flash power or ISO a little more than expected. Experience will help you here.
Whilst a pain to execute the first time you try it, by your second or third indoor event where you're shooting manual flash, you'll have no problems and you'll realise that you rarely have to adjust anything if you're shooting at the same aperture, using a bounce card (or diffusion dome) and not moving back and forth between drastically different ambient light, which for the most part, you won't be!
Fill Flash
Fill flash, unless you're trying to go head-to-head with the sun, often requires very little flash power compared to bounce flash. You're not trying to light up the subject, you're just trying to add a little bit of light to the shadows. If you're using the Fuji X-E1 or X-E2, I'd highly suggest just trying to use the inbuilt flash and seeing how you go. With the X-T1, try the small EF-X8 flash first. Yes, this is a cop-out, but the point of this article isn't to convince you to always use manual flash - it's to make your life as easy as possible, so if the inbuilt flash or EF-X8 unit works, then just use them, they'll work fine for balancing against indoor lights.
The reason why using manual flash for fill is difficult is because it requires some understanding of guide numbers and at the end of the day, either some estimation or form of estimation. My best advice is to just forget about guide number calculators and understand the concept of the inverse square law and the relationships between distance, flash power, aperture and ISO. It is important to remember the concept of a stop and the halving and doubling of the amount of light.
The Strobist has an article on this right here, which explains it in far better detail than I could possibly hope to. The part to pay attention to is regarding learning an anchor point for your flash. Once you're able to do this, you'll be able to work much more quickly. But if you're lazy, like me, just use the EF-X8 or pick up an EF-X20 for your fill flash needs. Sorry manual flash, but for fill flash, manual is much more of a pain, especially because the distance from you to your subject will vary considerably, compared to bouce flash, where the distance from your camera to the ceiling won't vary so dramatically.
Conclusion and Summary
Using manual flash will never be as easy as using TTL flash. Just like using manual exposure will never be as easy as using automatic exposure and driving a manual transmission car will never be as easy as driving an automatic. If manual flash were easier, then TTL wouldn't exist and if I found a magical way of making manual flash easier, I'd be a much richer person than I am now.
That said, if we have a system for assisting us, then we can make doing things manually easier and less painful. Many of us are comfortable shooting in manual exposure mode because we can quickly gauge light and only take a few quick seconds to take test shots and correct our guesses.
The same goes for manual flash. Using manual flash is difficult, that's why most people don't use it - you'd look foolish trying to take test shots and adjust your flash power in front of a group of people wanting their photo taken. You need to do the homework beforehand and not only have a plan, but also an understanding of the settings you're going to use and guess what - if you're coming in prepared, things become much easier to execute and after a couple of times, you'll find yourself only needing 15 minutes more at the start of an event to get your flash settings and then you'll be shooting the entire day or night without even thinking twice about flash exposure again. Just 15 more minutes of work than TTL and a bit more understanding of what's going on - not too bad right? Especially considering how cheap the YN-560 IV flashes are!
